How I built my own local LLM stack
February 06, 2026 | Karlo Krakan | Updated: February 16, 2026
The journey to building my own self-hosted AI stack started with a simple desire: I wanted to run a local LLM interface like Open WebUI that could chat intelligently, generate images on demand, and even speak responses aloud—all powered by my modest nVidia RTX 2060 Super GPU. What I thought would be a weeknight project turned into a whole weekend of research, trial-and-error reboots, and late-night debugging sessions. The setup involved Proxmox virtualization, GPU passthrough to a Debian VM, Docker Swarm orchestration, NVIDIA container support, multiple AI services, and a secure Traefik reverse proxy. Here's how it all came together, step-by-step.
Laying the Foundation: Proxmox and GPU Passthrough
Everything runs inside a Debian VM on a Proxmox host. The RTX 2060 Super sits in the host machine, and getting it usable inside the VM required enabling PCIe passthrough.
First, on the Proxmox host, I ensured IOMMU was enabled. This involved editing GRUB:
# /etc/default/grub
GRUB_CMDLINE_LINUX_DEFAULT="quiet intel_iommu=on iommu=pt" # or amd_iommu=on for AMD CPUs
Then run update-grub and reboot. Next, identify the GPU's PCI IDs with lspci -nn | grep NVIDIA. For my 2060 Super, it showed something like:
01:00.0 VGA compatible controller [0300]: NVIDIA Corporation TU106 [GeForce RTX 2060 SUPER] [10de:1f06]
To prevent the host from claiming the GPU at boot, I blacklisted the open-source Nouveau driver and the proprietary NVIDIA driver, then told the kernel to bind the GPU (and its HDMI audio controller) directly to the VFIO driver instead. This is done by specifying the PCI device IDs in a modprobe configuration file.
Create /etc/modprobe.d/blacklist-nvidia.conf:
blacklist nouveau
blacklist nvidia
And create /etc/modprobe.d/vfio.conf:
options vfio-pci ids=10de:1f06,10de:10f9
The first ID (10de:1f06) is the graphics card itself (RTX 2060 Super), and the second (10de:10f9) is the associated HDMI/DisplayPort audio device. You can find both IDs by running lspci -nn | grep NVIDIA on the Proxmox host. Including the audio function is important because NVIDIA GPUs often expose an audio controller alongside the video one, and passing only the video part can cause instability or no audio output in the VM.
Update initramfs (update-initramfs -u -k all) and reboot again. In the Proxmox UI, add the PCI device to the VM under Hardware → Add → PCI Device, selecting the GPU and its audio function, with "All Functions" and "Primary GPU" checked.
Inside the Debian VM, enable the non-free and non-free-firmware repositories (NVIDIA drivers are proprietary):
sudo sed -i 's/main$/main contrib non-free non-free-firmware/' /etc/apt/sources.list
sudo apt update
Then install the kernel headers (required for DKMS to build the NVIDIA kernel module) and the full driver metapackage:
sudo apt install linux-headers-$(uname -r) build-essential dkms
sudo apt install nvidia-driver nvidia-kernel-dkms
Reboot the VM:
sudo reboot
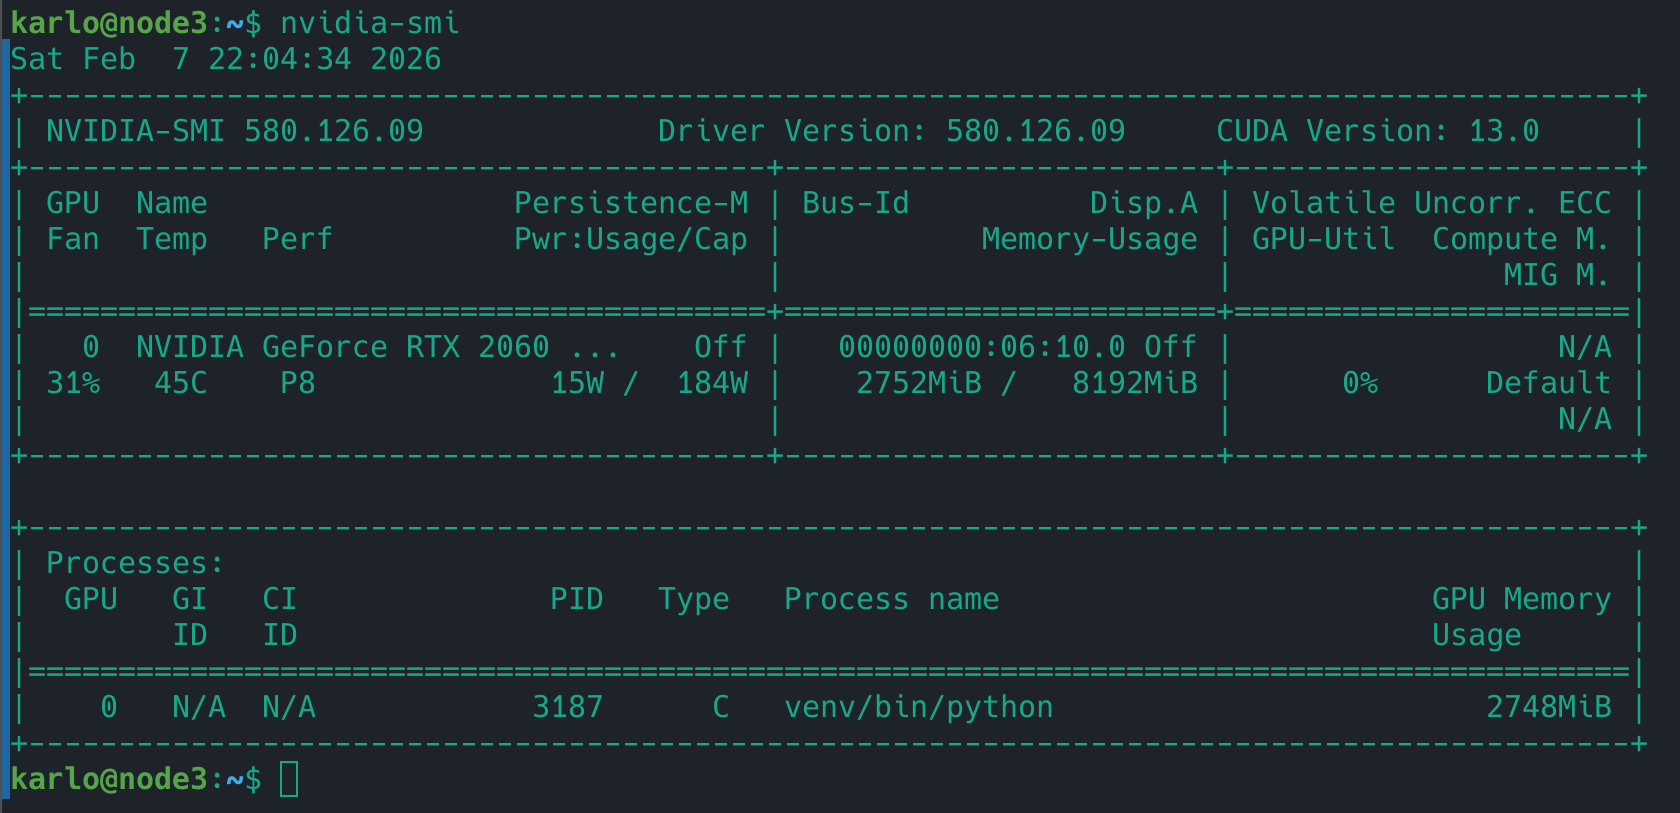
After reboot, run nvidia-smi — you should see your GPU listed with driver details. If it complains about the module not loading, double-check that Nouveau is blacklisted (from earlier steps) and no conflicts remain.
Enabling Docker to Use the GPU: nvidia-container-toolkit
With the GPU visible in the VM, Docker Swarm needed access for containers. Install the NVIDIA Container Toolkit:
curl -fsSL https://nvidia.github.io/libnvidia-container/gpgkey | sudo gpg --dearmor -o /usr/share/keyrings/nvidia-container-toolkit-keyring.gpg
curl -s -L https://nvidia.github.io/libnvidia-container/stable/deb/nvidia-container-toolkit.list | \
  sed 's#deb https://#deb [signed-by=/usr/share/keyrings/nvidia-container-toolkit-keyring.gpg] https://#g' | \
  sudo tee /etc/apt/sources.list.d/nvidia-container-toolkit.list
sudo apt update
sudo apt install -y nvidia-container-toolkit
sudo nvidia-ctk runtime configure --runtime=docker
sudo systemctl restart docker
For Swarm, this only needs to be done for the node that has the GPU. Testing with a simple container:
docker run --rm --gpus all nvidia/cuda:12.0.0-base-ubuntu22.04 nvidia-smi
Seeing the GPU listed felt like a huge win after a day of headaches.
Using this setup, multiple GPUs can be assigned to the VM but I've only tested the set-up with a single GPU.
Orchestrating with Docker Swarm
I already run several services in my Docker Swarm cluster as part of my Digital Sovereignty Initiative which I will discuss more in future posts. This is beyond the scope of this post, the point is that I had already had an initialized a Docker Swarm cluster with 3 nodes (3 different Debian VMs in my Proxmost host). I added the new node to the Swarm by finding the join-token with docker swarm join-token worker on a manager node.
I then labelled the GPU node:
docker node update --label-add nvidia=true debian3
The Core AI Stack
The main docker-compose.yml (deployed as a Docker Swarm Stack) looked like this:
services:
  ollama:
    image: ollama/ollama:latest
    command: serve
    deploy:
      restart_policy:
        condition: any
      replicas: 1
      placement:
        constraints:
          - "node.labels.nvidia==true"
    environment:
      - OLLAMA_FLASH_ATTENTION=1
    volumes:
      - /config/ollama:/root/.ollama
    networks:
      - ai

  stable-diffusion:
    image: universonic/stable-diffusion-webui:full
    deploy:
      replicas: 1
      placement:
        constraints:
          - "node.labels.nvidia==true"
    command: --api --disable-safe-unpickle --enable-insecure-extension-access --listen
    ports:
      - 8080:8080
    volumes:
      - /config/stablediffusion:/app/stable-diffusion-webui
    networks:
      - ai

  searxng:
    image: searxng/searxng:latest
    deploy:
      replicas: 2
      placement:
        constraints:
          - "node.labels.nvidia==true" # even if not GPU heavy
    volumes:
      - /config/searxng:/etc/searxng
    environment:
      - SEARXNG_SECRET_KEY=${SEARXNG_SECRET_KEY}
    networks:
      - ai

  perplexica:
    image: itzcrazykns1337/perplexica:slim-latest
    deploy:
      replicas: 1
      placement:
        constraints:
          - "node.labels.nvidia==true"
    environment:
      - SEARXNG_API_URL=http://searxng:8080
      - OLLAMA_API_URL=http://ollama:11434
      - HOST=0.0.0.0
      - HOSTNAME=0.0.0.0
    ports:
      - 3000:3000
    networks:
      - ai
      - proxy

  kokoro:
    image: ghcr.io/remsky/kokoro-fastapi-cpu:latest
    ports:
      - 8880:8880
    deploy:
      restart_policy:
        condition: any
      replicas: 1
      placement:
        constraints:
          - "node.labels.nvidia==true"
      resources: {}

networks:
  ai:
    name: ai
    driver: overlay
    attachable: true
  proxy:
    external: true
Ollama handles the LLM backend. Stable Diffusion provides image gen (exposed via API for Open WebUI integration). SearXNG gives private search for RAG-like features in tools like Perplexica. Kokoro adds TTS for spoken responses in Open WebUI.
Open WebUI (on a separate node) connects via env vars like OLLAMA_BASE_URLS=http://ollama-ip:11434, with Traefik labels for HTTPS.
services:
  openwebui:
    image: ghcr.io/open-webui/open-webui:latest
    deploy:
      restart_policy:
        condition: any
      replicas: 1
      placement:
        constraints:
          - "node.labels.node4==true"
      resources: {}
      labels:
        traefik.enable: "true"
        traefik.http.routers.openwebui.rule: Host(`chat.example.com`)
        traefik.http.routers.openwebui.entryPoints: websecure
        traefik.http.routers.openwebui.tls.certresolver: sslresolver
        traefik.http.routers.openwebui.tls.domains[0].main: example.com
        traefik.http.routers.openwebui.tls.domains[0].sans: "chat.example.com"
        traefik.http.routers.openwebui.service: openwebui
        traefik.http.services.openwebui.loadbalancer.server.port: 8080
        # WebSocket passthrough configuration
        traefik.http.services.openwebui.loadbalancer.passhostheader: "true"
        traefik.http.routers.openwebui.middlewares: openwebui-headers
        traefik.http.middlewares.openwebui-headers.headers.customrequestheaders.X-Forwarded-Proto: https
    volumes:
      - /config/openwebui:/app/backend/data
    environment:
      - OLLAMA_BASE_URLS=http://ollama:11434
      - WEBUI_SECRET_KEY=${WEBUI_SECRET_KEY}
      - CORS_ALLOW_ORIGIN=${CORS_ALLOW_ORIGIN}
    networks:
      - ai
      - proxy

networks:
  ai:
    external: true
  proxy:
    external: true
Securing Access with Traefik
I didn't want to expose raw ports. Traefik v2.11 handles ingress with Let's Encrypt (Cloudflare DNS challenge):
services:
  socket-proxy:
    image: tecnativa/docker-socket-proxy:latest
    volumes:
      - /var/run/docker.sock:/var/run/docker.sock
    environment:
      SERVICES: 1
      TASKS: 1
      NETWORKS: 1
      SWARM: 1
    networks:
      - traefik-docker
    deploy:
      mode: global
      placement:
        constraints:
          - node.role == manager
      update_config:
        order: start-first
      restart_policy:
        condition: any
      resources:
        limits:
          cpus: "0.20"
          memory: 64M
    healthcheck:
      test: wget --spider http://localhost:2375/version || exit 1
      interval: "20s"
      timeout: "5s"
      retries: 3
      start_period: "20s"

  traefik:
    image: traefik:v2.11.34
    command:
      - --log.level=DEBUG
      - --providers.docker
      - --providers.docker.endpoint=tcp://socket-proxy:2375
      - --providers.docker.swarmMode
      - --providers.docker.network=proxy
      - --providers.docker.watch
      - --providers.docker.exposedbydefault=false
      - --api
      # General HTTP endpoint - redirection to HTTPS
      - --entrypoints.web.address=:80
      - --entrypoints.web.http.redirections.entryPoint.to=websecure
      - --entrypoints.web.http.redirections.entryPoint.scheme=https
      - --entrypoints.web.http.redirections.entryPoint.permanent=true
      # Secured HTTP endpoint
      - --entrypoints.websecure.address=:443
      - --entrypoints.websecure.http.tls=true
      - --entrypoints.websecure.http.tls.certresolver=sslresolver
      # Enable Ping healthcheck
      - --ping
      - --ping.entrypoint=ping
      - --entrypoints.ping.address=:8080
      # TLS management with Let's Encrypt, using the DNS challenge
      - --certificatesresolvers.sslresolver.acme.storage=/etc/traefik/acme/acme.json
      - --certificatesresolvers.sslresolver.acme.dnschallenge=true
      - --certificatesresolvers.sslresolver.acme.dnschallenge.provider=cloudflare
    environment:
      - CF_DNS_API_TOKEN=${CF_DNS_API_TOKEN}
    volumes:
      - /srv/protected/acme:/etc/traefik/acme
    deploy:
      mode: global
      restart_policy:
        condition: any
      update_config:
        delay: 10s
        order: start-first
        parallelism: 1
      rollback_config:
        parallelism: 0
        order: stop-first
    healthcheck:
      test: traefik healthcheck --ping
      interval: "20s"
      timeout: "5s"
      retries: 3
      start_period: "30s"
    networks:
      - traefik-docker
      - proxy
    ports:
      - target: 80
        published: 80
        protocol: tcp
        mode: host
      - target: 443
        published: 443
        protocol: tcp
        mode: host
    networks:
      - traefik-docker
      - proxy

networks:
  traefik-docker:
    name: traefik-docker
    driver: overlay
  proxy:
    driver: overlay
    name: proxy
The socket-proxy limits what Traefik can do with the Docker socket—crucial for security in Swarm.
Final Thoughts
This setup gives me a private AI playground: chat with Ollama models via Open WebUI, generate images with SD, search privately, get TTS, all accelerated by the 2060 Super. The VRAM limits me to ~7-13B models comfortably, but it's snappy.
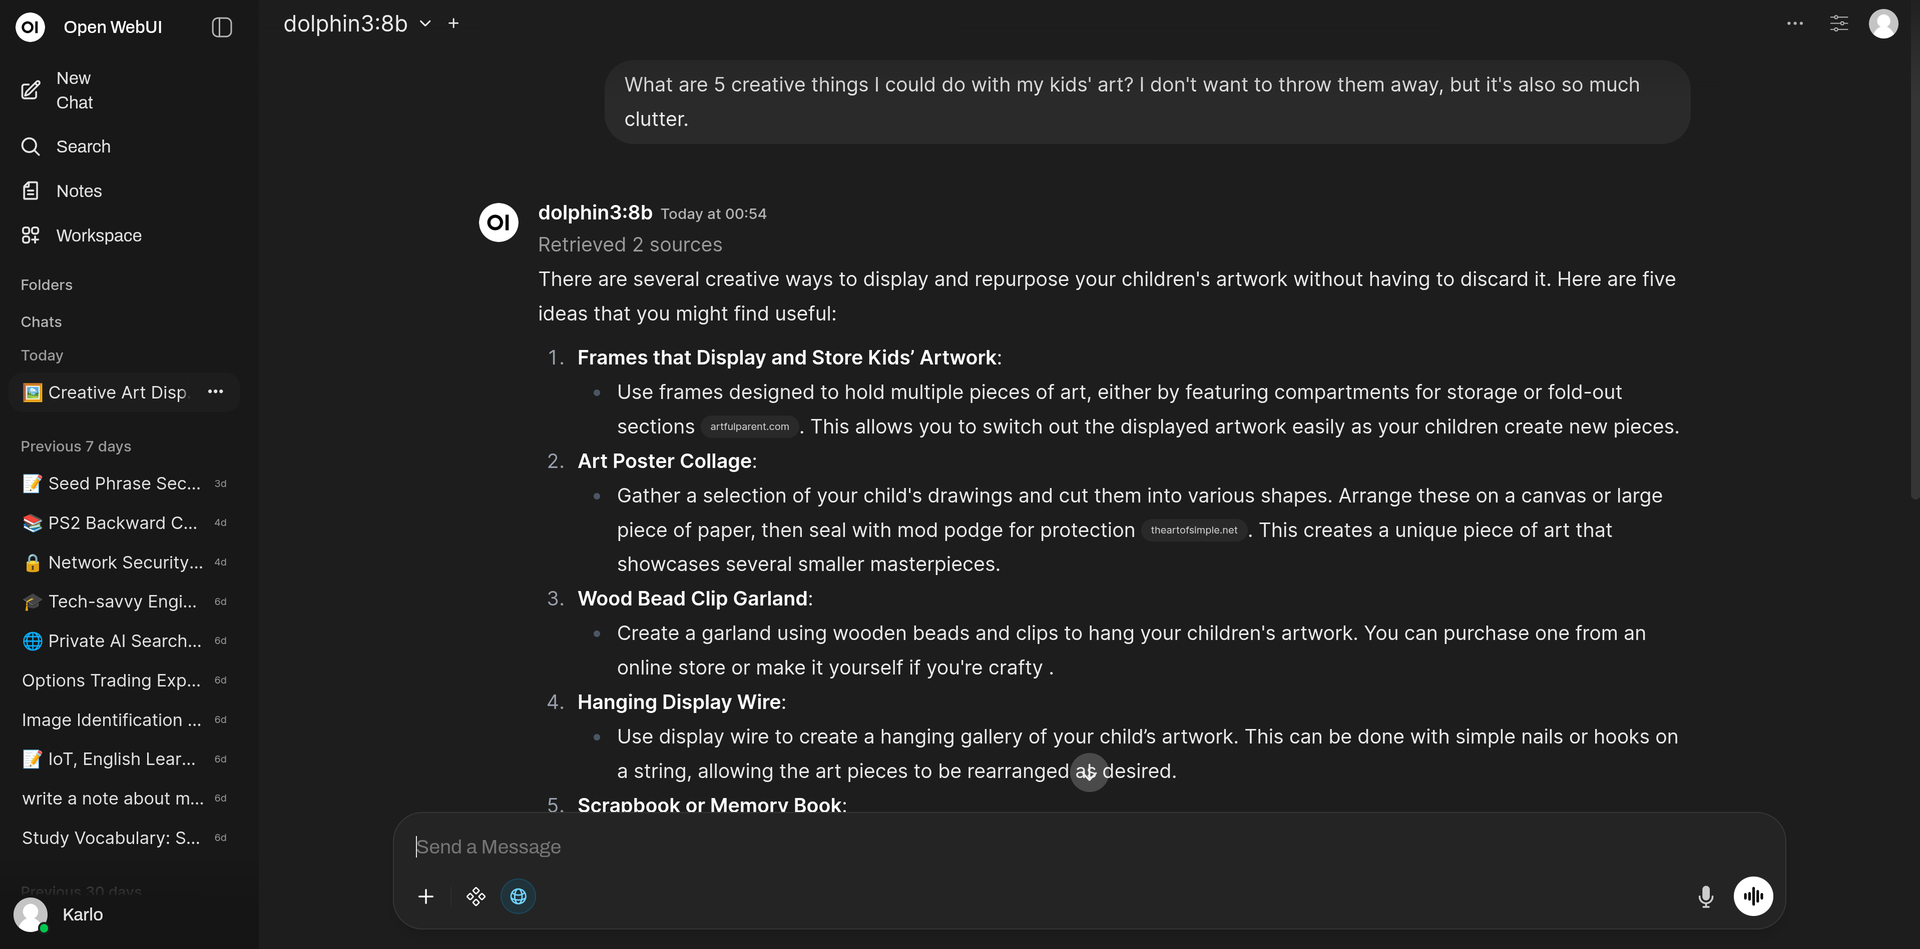
The real cost was the learning curve—hours reading Proxmox wikis, NVIDIA docs, fighting driver black screens, Swarm networking quirks, and Traefik label syntax. If you're starting, test GPU visibility early, use --gpus all liberally for debugging, and keep backups of configs.
It was painstaking, but now it's mine—no cloud subscriptions, full control, and a great learning experience.